How to Build a Multi Language Website
If you click to purchase a product or service based on our independent recommendations and impartial reviews, we may receive a commission. Learn more
If you’re reading this guide, it’s likely you already know how important a multi-language website can be. Did you know, for example, that 75% of global consumers prefer to buy products in their native language?
There are two main ways to build a multi-language website, which we’ll walk you through in this guide. The first method is to build a website using a builder, while the second method is to build with WordPress.
Website builders are best if you need something quick, easy, and professional. Alternatively, WordPress is best if you have time, basic tech skills, and want ultimate control over your site. We’ll help you choose the best method for you, so read on to get started!
Option 1: Use a Website Builder
How to Build a Multi Language Site Using a Website Builder: 9 Steps
- Choose the best website builder for you.
- Sign up to the right plan for you.
- Register a unique domain name.
- Pick a template you love.
- Customize your design.
- Add and format (and translate) your site’s content.
- Make it multilingual!
- Preview and test your website.
- Publish your multi language website online.
Step 1: Choose the best website builder for you
The very first thing you need to do to build your multi language website using a website builder is, well, choose a website builder!
There are hundreds of different builders out there, which can make picking the right one difficult. Luckily for you, our expert team has put in the hours finding the very best website builders on the market. Our careful research cuts through the noise to bring you only the top rated platforms – so all you need to do is pick one!
Our three best rated website builders are Wix, Squarespace, and Weebly. You can see how they scored in our research below:
To bring you the best results, we test different areas of every website builder we review. These areas include ease of use, features, value for money, help and support, and design. Each area receives a star rating out of five, and the builder receives an overall rating, too.
You can read our full methodology to learn more about our website builder research process.
Here’s a guide to our star ratings and what they mean:

As you can see, Wix received the highest star rating, making it the best website builder overall. One of Wix’s standout strengths is that it’s extremely easy to use, while still offering tons of creative freedom – you don’t have to sacrifice customization for easy editing.
Each of these builders comes with its own set of pros, cons, features, and strengths that may appeal to you. We’ll quickly walk you through each one to help you decide.
Wix
Best overall website builder
Free plan? Yes
Cheapest price plan: $17 per month (billed annually)
Multi language features: Wix Multilingual feature built into your site settings
Wix earned its top spot in our rankings with its huge range of over 500 stylish template designs, its easy to use editor, and its ability to provide total creative freedom, even for beginners. You don’t need to code to use Wix, and its free plan means anyone can get started.
But what about multi language options? Once you’ve built your site, you simply enable Wix Multilingual in your site settings, and you have over 100 languages to choose from. We’ll discuss this in more detail later!
Find out more
Like the sound of Wix? Read or full Wix Review to discover more about our top rated builder.
Squarespace
Best website builder for creatives
Free plan? No – 14-day free trial instead
Cheapest price plan: $16 per month (billed annually)
Multi language features: Create different sets of pages for each language
Squarespace can’t be beaten in terms of template design – its award-winning designs are professional, modern, and attractive, making them perfect for creatives. It has a 14-day free trial, and you don’t need coding skills to create a website with Squarespace.
That said, Squarespace isn’t as easy to use as Wix – and this applies to its multi language features, too. It doesn’t have built-in multilingual tools like Wix does – instead, it recommends creating a set of pages for each language.
Out of the three builders, Squarespace is the hardest one to create a multi language website with. The process takes time and patience, and if you’re not technically confident, we recommend Wix or Weebly for your multi language site instead.
Find out more
- Are you excited at the thought of Squarespace’s stunning designs? Our in-depth Squarespace Review will help shine a light on whether this builder is right for you.
- We interviewed Timo Nausch about the German-language website he built with Squarespace
Weebly
Best for small businesses
Free plan? Yes
Cheapest price plan: $6 per month (billed annually)
Multi language features: Use a multi language app from Weebly’s App Center
With a free plan and a strong ecommerce focus, Weebly is a popular builder that’s great for small businesses. It also comes with impressive blogging and SEO features, and a huge app store to help customize and scale your website.
The best way to create a multi language website with Weebly is to use one of the multi language apps available in Weebly’s App Center, which you can install with a single click.
Find out more
- Weebly is a feature-rich and affordable builder – learn more about what makes Weebly so popular (and what it’s not so good at) in our detailed Weebly Review.
We know picking the right builder can be hard, so here are a few tips to help you make the best choice:
- How technically confident are you? If you’re a tech beginner, you’ll want an easy to use builder – in this case, pay extra attention to our “ease of use” star ratings!
- What’s your budget? If you’re on a tight budget, look for affordable pricing plans. We don’t recommend using a free plan for long – try to only use it for testing out builders and their features.
- What sort of site are you building? Blogs and online stores have different needs, for example, so make sure to research any features you need thoroughly.
- Can you try the builder for free? We highly recommend making the most of free plans and free trials – it’s super important to try before you buy! Sample a few different builders to see which one you like the best before committing.
- Looked at different website builders
- Tried out your favorite options
- Chosen the right builder for you
Find out more
- Not a fan of any of our top three builders? No problem – we have a whole list of the Best Website Builders on the market for you to choose from!
Step 2: Sign up to the right plan for you
Once you’ve picked the builder you want to use, you’ll need to choose a price plan.
We’ll start off by saying that although a lot of website builders let you build for free, we don’t recommend this if you want a professional website. Free plans aren’t designed for long-term use – they’re not scalable or built to support serious growth.
The good news is, even website builders’ paid plans are much less expensive than hiring a web designer.
When choosing a plan, look at the features on offer as well as the prices. For example, if you’re building a multi language store, then you’ll need a plan that comes with ecommerce tools!
You can choose between a monthly or annual subscription, but a quick heads up – builders usually advertise monthly prices for annual plans. For example, Wix’s $17 per month Light plan is billed annually, which means you’ll actually be paying $204 upfront for the year.
- Compared different price plans
- Found one that suits your needs as well as your budget
- Decided whether you want a monthly or annual subscription
- Signed up to your chosen price plan
Find out more
- How Much Does a Web Site Cost? Our helpful guide answers all your pricing questions.
- Looking for more detail on pricing? Check out our pricing guides:
- Wix Pricing – we explore all of Wix’s plans and prices
- Squarespace Pricing Review – we help you find your perfect Squarespace plan
- Weebly Pricing Review – is Weebly worth your money? Find out in our review
Step 3: Register a unique domain name
When you sign up, chances are you’ll be able to register a domain name as part of the setup process. Your builder may give you a free domain for one year, in which case you can choose and register your domain without paying a cent!
Most builders let you buy domains directly through them. If your builder doesn’t come with this capability, you’ll need to buy a domain from a registrar like GoDaddy, and then connect it to your site. Buying directly from your builder is much quicker and easier, though!
Domains vary in price, but on the whole they cost between $12 and $30 per year.
Domains are unique, meaning you have to register one that doesn’t belong to anyone else. We’ve put together some top tips for choosing a domain below:
- Make it short – domains should be memorable, so try to make yours short and snappy!
- Keep it relevant – ideally your domain should reflect your website or brand.
- Avoid complex language – if nobody can spell your domain, chances are they’ll struggle to find it.
- Don’t use numbers or punctuation – when you say a number aloud, others don’t know if it should be written out or not. For example, www.lucyscupcakes2.com sounds exactly the same as www.lucyscupcakestwo.com, which is confusing!
- Make it unique – you can’t use the same domain as anyone else, so register yours before it’s too late! If your domain is already taken, don’t just add a number on the end or change the spelling slightly. Try to find a domain that’s completely yours.
- Checked if your builder lets you register a domain in-house
- Checked if your chosen plan gives you a free domain
- Decided on your ideal domain
- Registered your domain name so that nobody else can take it!
Find out more
- Got questions about domains? Our What is a Domain Name? Beginner’s Guide will fill in the gaps
- Wondering where to register your domain? Discover the 6 Best Domain Name Registrars in our helpful list
Step 4: Pick a template you love
So you have an account and a domain, but still no website. That’s about to change, though!
Now is the time to pick a template design. This will provide the base for your website’s layout, design, and page structure, so it’s worth taking your time and picking a template you love.
You can customize your design to make it yours, so don’t worry if you don’t love everything about your template. Still, you should be happy with the general style and aesthetic, as changing everything is a lot of work!
It’s worth mentioning here that Wix’s Multi Language feature is only available if you build your site using the traditional Wix Editor, rather than Wix ADI.
When you build using the Wix Editor, you follow the steps we’re describing in this guide. You sign up, pick a template to customize, and build your site yourself.
Wix ADI is Wix’s design assisted builder. It builds a website for you, by asking you questions to tailor its designs. In this case, you don’t choose a template first because Wix ADI creates a tailored design based on your specific needs.
While this may sound appealing, you can’t build a multi language website using Wix ADI, so we recommend using the traditional Wix Editor.
You can learn more about Wix Editor vs Wix ADI in our helpful comparison.
Luckily, all of Wix, Weebly, and Squarespace’s templates can be used to create a multi language website, so we’ll just leave you to explore their designs for a while. Happy browsing – join us for step five (customizing your design) whenever you’re ready!
- Previewed different designs to see which one you like the best
- Selected your favorite template
Step 5: Customize your design
Once you’ve chosen your template, you get to have fun customizing it!
None of our three top builders require you to know any code, so you can create a unique site without any serious tech skills.
Change up the colors on your site, pick your own font, upload your own images, add galleries, and mix up the general page structure – don’t be afraid to put your own spin on your template! Here are some of the key things to think about when customizing your site:
- Color schemes
- Fonts
- Images
- Buttons
- Menus
- Logo placement
- Headings
These are just some of the basic elements you can easily change to give your website a more unique and branded design. To learn more about the best ways to customize your template, check out our guide on How to Design a Website for eight simple steps to follow.
Whatever design customizations you make, always make sure your choices – your color scheme, for example – are consistent across your website.
- Experimented with different design options
- Customized your design until you’re happy
- Made sure your design is consistent across all your pages
Step 6: Add and format (and translate) your site’s content
Now you’ll have a beautifully customized website, but it’s not looking quite right. It’s still got the sample text that came with the template!
Now is the time to write, upload, and format the copy for your website. This includes a welcome page, your About Us page, button text, blog posts, product descriptions, and so on.
We have a guide revealing our top tips for writing for the web, to help you get the most out of your online copy, so check that out when you have a minute!
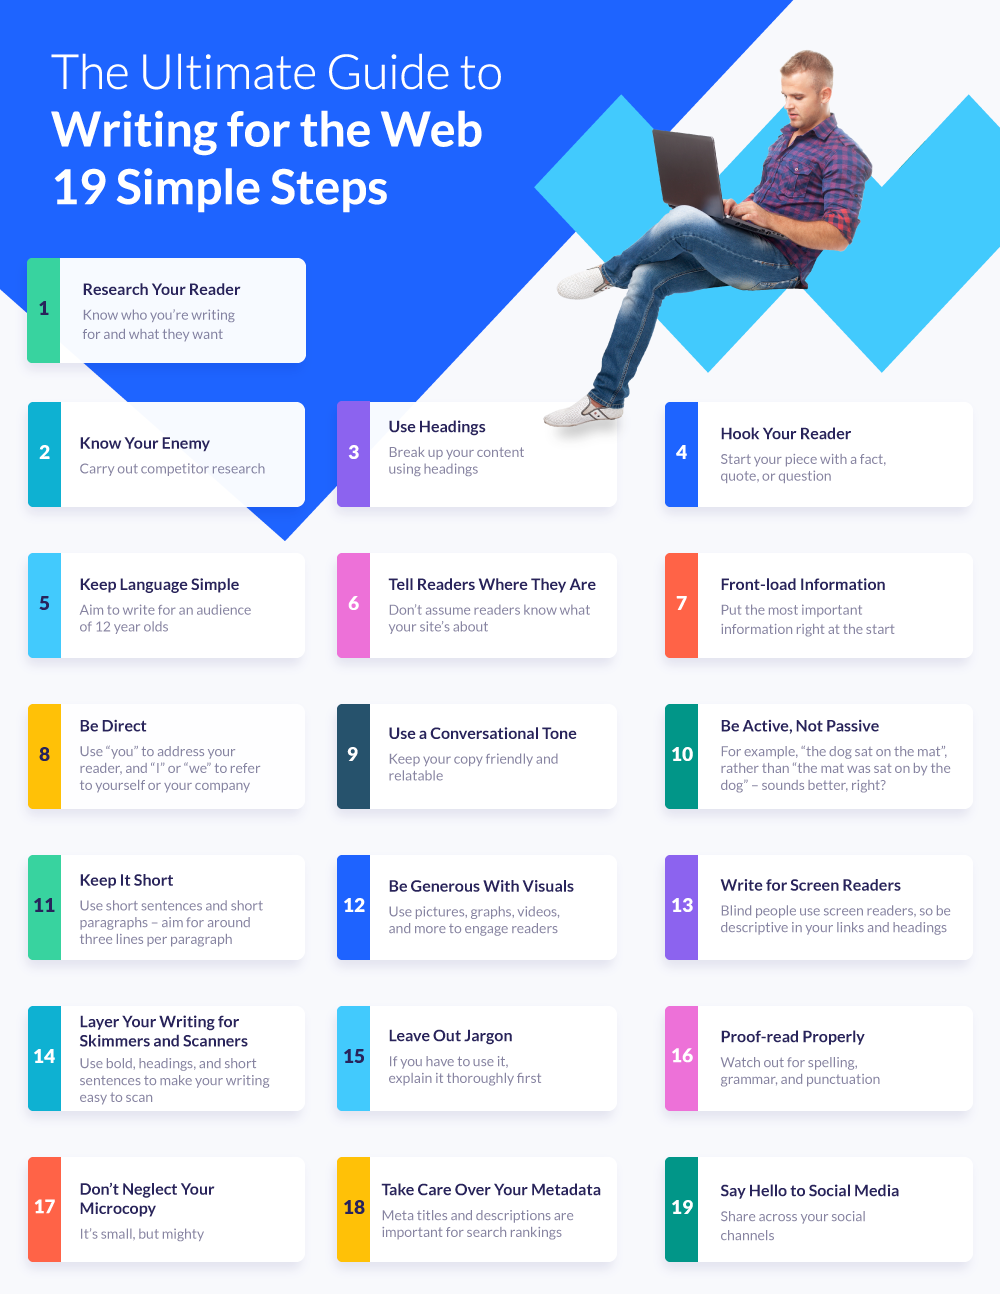
When formatting your text, try to avoid large paragraphs or small fonts – you want your text to be as easy to read as possible. Use headings and white space to break up your text and keep your readers engaged.
Once you have your site’s content sorted, it’s a good idea to start translating. Sadly, not many website builders have tools that can translate your content for you, so starting the process now will speed things along in the next section!
- Written content for your website
- Uploaded it onto your site, replacing the sample template text
- Formatted your content to make it readable
- Started translating your text
Step 7: Make it multilingual!
How you go about translating your website will depend on which website builder you’re using, as each one has different multi language features and capabilities. We’ll walk you through translating your website using Wix in most detail first, but we’ll also look at Squarespace and Weebly in just a second.
Using Wix Multilingual
Wix Multilingual works by creating versions of your website. It does this instead of creating duplicate sites, which can become difficult to manage. You simply switch between these versions to make changes.
When you add something new to your site – a button, for example – it appears across all versions of your site, meaning you effectively only need to design your site once. You then go through and make any necessary translations in each language.
So, how do you get started with Wix Multilingual?
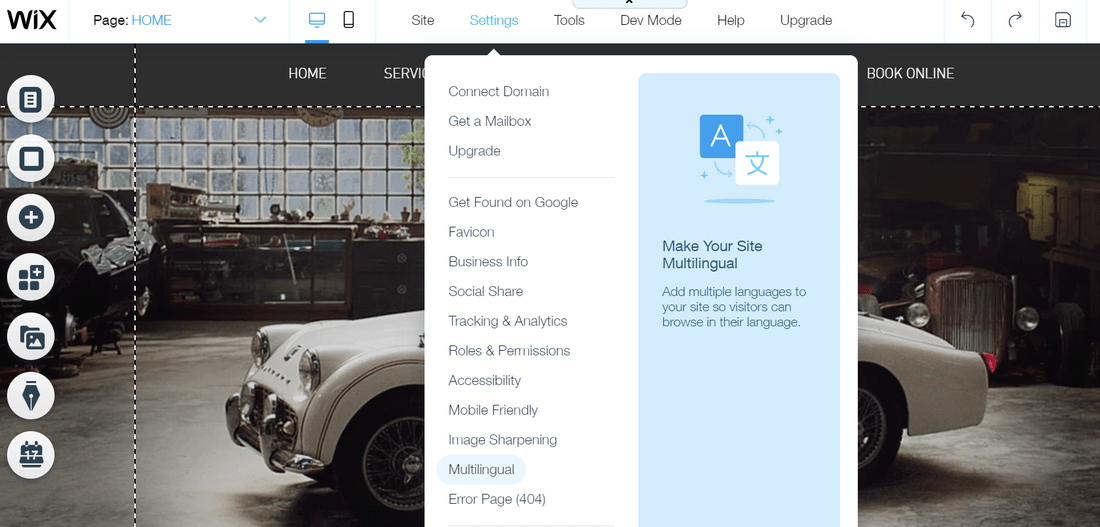
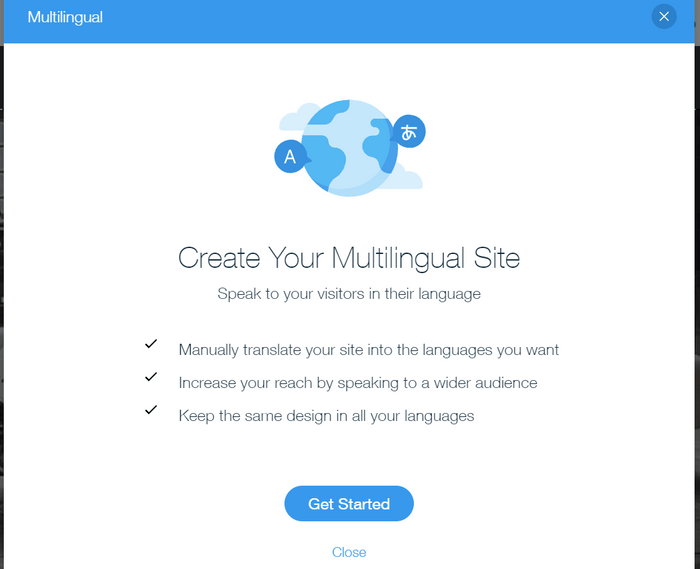
Go to your Settings in the Wix editor, select Wix Multilingual, and click “Get Started” to add it to your site.
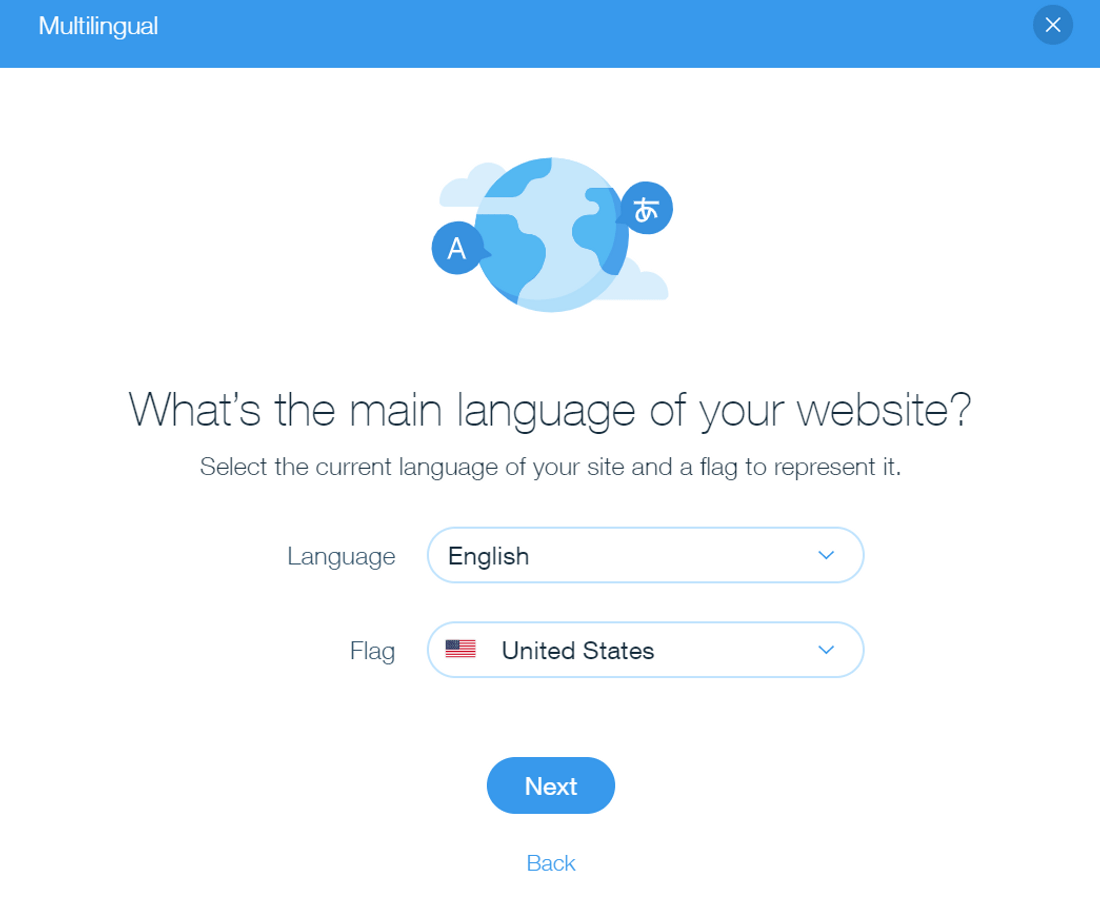
Then, choose your main language and your secondary languages. It’s easy to switch between languages in your editor using the Switch Languages panel at the top of the Editor.
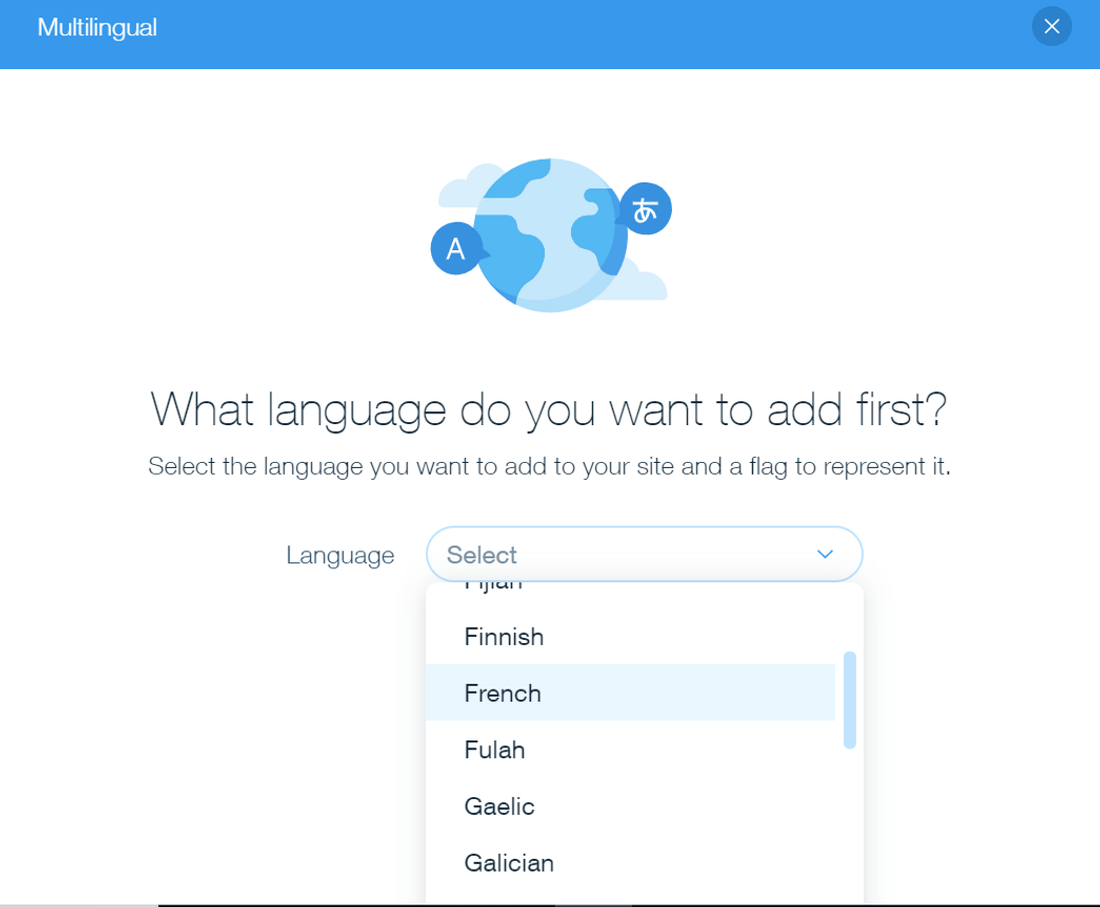
Translate your site menu by simply double-clicking on each menu item and entering the translation, then clicking Done to finalize it.
Translate your site’s content by clicking on the text you want to translate. Two buttons appear – one that says “Edit Translation”, and another that says “Translate With Google.”
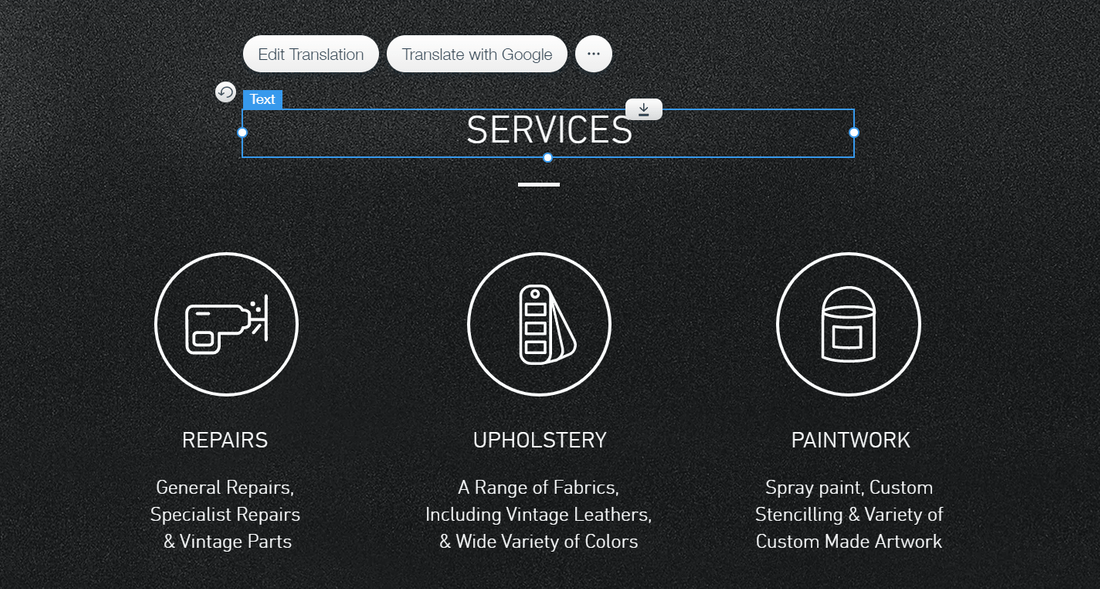
The first is a manual option – handy if you’ve already translated your content, or if you speak multiple languages. The second option uses Google to automatically translate your text right there inside your editor, which is helpful but not always 100% reliable.
By selecting images and clicking “Edit Translation”, you can change the image settings for different languages, and even replace the image completely so that different audiences see different content!

You can translate some Wix apps, including Wix Stores, Wix Events, and Wix Chat. Not all apps are translation friendly yet, but Wix says this is something it’s working on. These apps are usually translated from the Multilingual dashboard (rather than from the editor like text and images).
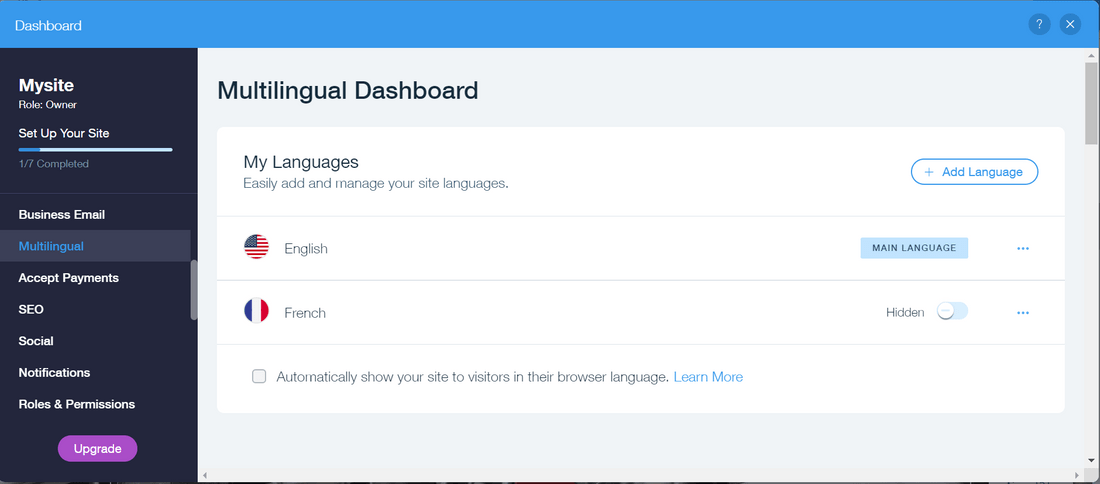
These are the basic steps to using Wix Multilingual – you can find more detail and examples in Wix’s guide to translating your site if you still have questions!
Squarespace doesn’t have built-in multi language functionality like Wix does, meaning it doesn’t make your life quite as easy. Squarespace’s official recommendation for creating a multi language website is to create separate sets of pages for each language.
This is a lot more work than using a built-in tool, so just a heads up that if you want something quick and easy, this option isn’t for you. The easiest way to create a multi language Squarespace website is to use a third party plugin like Weglot.
If you want to follow Squarespace’s official multilingual guide, you’ll need to set up a homepage to link to each version of your site, a set of pages in each language, and a drop-down menu of each language option.
While Weebly doesn’t come with built-in multi language capabilities, it’s still easier to set up than Squarespace. This is thanks to Weebly’s huge app center, where you can add extra functionality to your website in a couple of easy clicks.
Simply search “multilingual” in Weebly’s App Center, and choose the multi language app you want to install (there are both free and premium versions). Weebly apps are easy to install – all it takes is a click or two, and they appear automatically in your site editor.
The translation features you get depend on the app you choose. For example, the ConveyThis app can actually translate your content for you, while the Bablic Translation app provides free one-on-one consultations and a network of professional translators.
We recommend checking out the ConveyThis app first – it has a free plan, carries out automatic translations for you, and provides professional translators to help you with proof-reading and corrections.
- Looked at the best way to translate your website
- Set up your site for translation (for example, by installing an app)
- Translate your site!
Step 8: Preview and test your website
Before you hit publish, it’s always a good idea to preview and check over your website to make sure there aren’t any formatting issues that need fixing. Here are a few things to look out for when previewing your website:
- Broken links
- Images that aren’t loading
- Slow-loading pages
- Spelling mistakes
- Inconsistencies in design
- 404 pages or error messages
- Confusing menu navigation
- Clunky mobile view
Checking your website is a common step in building a website – but it’s even more important if you’re building a multi language website!
You need to go through each language and check for the common glitches we’ve listed above. If you have different content or images for different audiences, there’s more room for error to sneak in, so go over everything with a careful eye to ensure everything looks as you planned.
It’s also worth double-checking your translations. Automatic translators are never 100% perfect, so if you copied and pasted from Google Translate, chances are there are mistakes in your copy.
Think about hiring a professional to proofread your website before publishing. Some translation services and apps come with a network of translators you can hire, or you can always look on Fiverr for freelance translators.
- Checked your website is free from errors
- Double-checked your translations
Step 9: Publish your multi language website online
Once you’re happy with your website, you can publish it for everyone to enjoy, no matter what language they speak!
Here’s a quick recap of the steps you’ve followed to reach this exciting moment:
- Choose the best website builder for you.
- Sign up to the right plan for you.
- Register a unique domain name.
- Pick a template you love.
- Customize your design.
- Add and format (and translate) your site’s content.
- Make it multilingual!
- Preview and test your website.
- Publish your multi language website online.
Once your site is live, it’s up to you to keep it updated, promote it, and help it grow – but that’s a topic for a different article (our How to Promote Your Website guide, for example!)
If you’re still not convinced a website builder is the right choice for you, then skip to the next section, where we walk you through how to build a multi language website with WordPress. If a website builder is the right choice for you, then happy building!
Option 2: Use WordPress (with Bluehost)
How to Build a Multi Language Site Using WordPress: 9 Steps
- Decide if you want to use WordPress.
- Choose the best web host for you (we recommend Bluehost).
- Register a unique domain name.
- Install WordPress to start building.
- Pick a theme you love.
- Customize your site and create your content.
- Make your site multilingual!
- Install any extra plugins you need.
- Check, preview, and publish your multi language WordPress site.
Step 1: Decide if you want to use WordPress
WordPress is an open-source platform, which means that you have total control over your website.
WordPress is powerful, flexible, and scalable – it can handle everything from baby blogs to incredibly complex websites, and there’s no glass ceiling in your way. The downside is that it takes more time and work to make a WordPress website successful than if you used a website builder.
WordPress is probably right for you if:
- You want full control over your website
- You enjoy the thought of getting hands-on with your website
- You’re planning a complex website
- You dream about unlimited customization
- You’re not in a rush
- You’re happy to get a little technical now and then
Sound good? Awesome – let’s get on with finding you a web host!
- Considered if WordPress is right for you
- If it’s not right for you, look at a web builder instead
- If it is right for you, read on!
Step 2: Choose the best web host for you (we recommend Bluehost)
WordPress is a self-hosted platform (unlike a website builder, where your site is hosted for you). Hosting is like a home for your website, and it’s important to pick the right one. If you choose a subpar web host, your site will struggle to succeed.
Luckily, we’ve spent hours researching, rating, and comparing hosting providers, so you can choose from the very best. And when it comes to WordPress, you won’t find any better than Bluehost.
Bluehost not only outperformed its competitors in our research, scoring 4.8 stars out of 5, but it also comes with an official recommendation from WordPress itself.
Of course, Bluehost isn’t the only great web host for WordPress users on the market – check out our carefully researched list of the 8 Best WordPress Hosts for more options.
Pick a Hosting Plan That Suits Your Needs
Hosting providers will often advertise their cheapest prices, but don’t jump straight onto the cheapest plan you can find. Shared hosting is the cheapest type of hosting, but it’s also the most limited, suitable only for very small blogs and brochure sites.
We recommend shared WordPress hosting – or even better, managed WordPress hosting – for your multi language WordPress website.
Managed WordPress plans come with more advanced features than shared plans. To give you an idea of what good managed WordPress hosting looks like, Bluehost’s cheapest managed WordPress plan comes with an all-in-one marketing center, daily backups, malware protection, and domain privacy on top of the usual WordPress auto-updates.
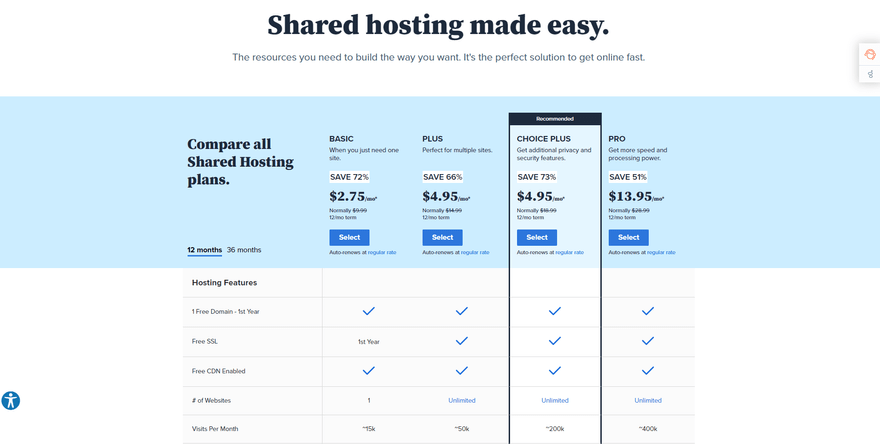
Managed hosting is usually more pricey than shared WordPress plans, because it comes packed with more features. For example, Bluehost’s cheapest shared WordPress plan costs $2.95 per month, while its cheapest managed WordPress plan costs $19.95 per month. These are introductory discount prices when you choose a 36-month subscription.
- Researched the top web hosts to find the right one for you
- Chosen a hosting plan that’s affordable and has the features you need
- Signed up for your hosting plan
Step 3: Register a unique domain name
When you sign up to a hosting plan, you’ll usually find that you get to pick and register a domain as part of the signup process. Some hosts, including Bluehost, even give you a free domain for your first year as part of your plan!
If you already have a domain, you can connect it to your site during the signup process – but if you don’t have a domain name already, then now is the perfect time to register one. Your host will guide you through the process and add any cost to your checkout.
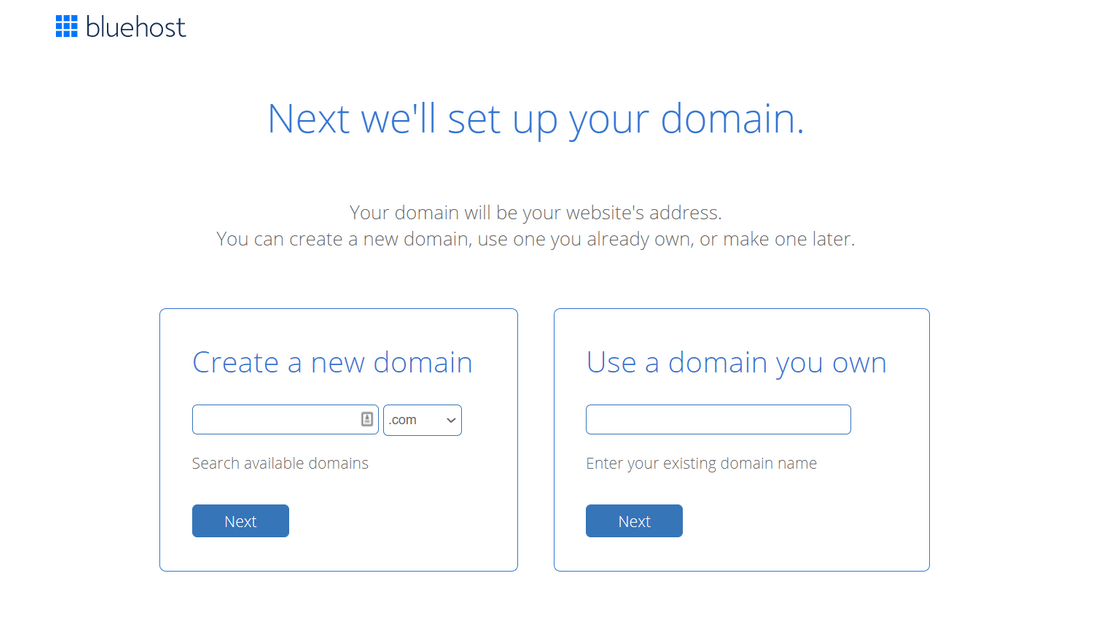
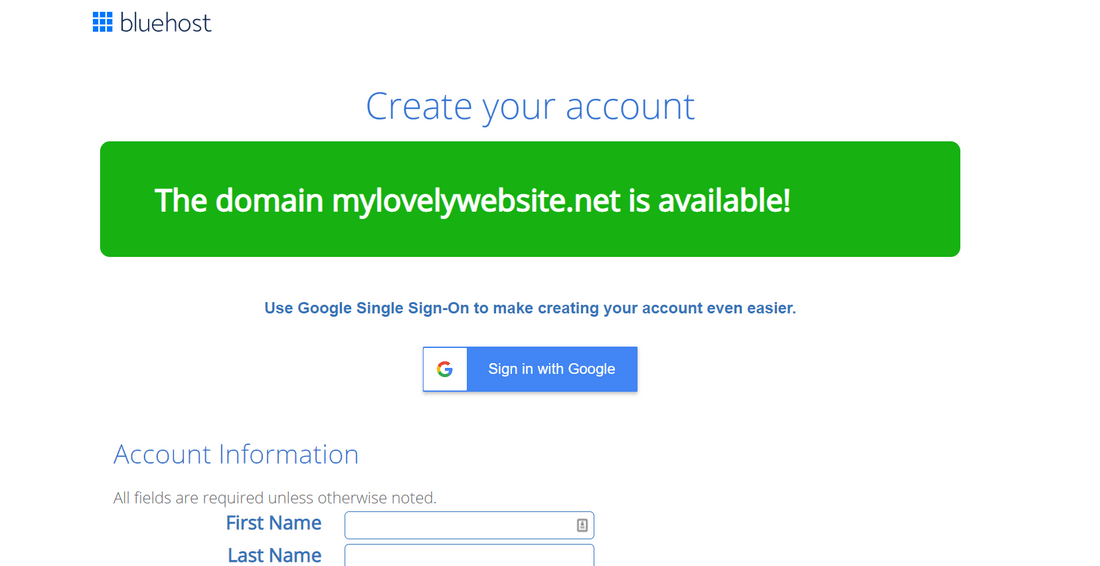
When choosing your domain name, try to make it unique, relevant, short, and memorable. Your host will tell you if the domain you want is already taken, and will usually suggest alternatives for you to choose from.
Once you’ve found a domain name that hasn’t been registered yet, you can claim it for yourself and continue setting up your hosting plan!
- Thought of the domain you want to use
- Checked it’s still available
- Registered a domain for your website
Step 4: Install WordPress to start building
If you’ve chosen a WordPress-specific hosting plan, this should be a quick and easy step, because your host should do all the work for you!
Bluehost comes with automatic WordPress installation. This means that as soon as you’ve signed up for your hosting plan, Bluehost automatically installs the latest version of WordPress, meaning it’s ready for you to start building with straight away.
Installing WordPress manually is possible, but we don’t recommend it. Honestly, it’s not worth the hassle. If your host doesn’t come with automatic WordPress installation, see if there’s a plugin you can use to install WordPress for you, rather than trying to do it yourself.
- Checked if your host offers automatic WordPress installation
- Installed WordPress
Step 5: Pick a theme you love
To create your website’s layout, structure, and design, you need to pick a theme. There’s an official WordPress theme library where you can browse through thousands of themes, so that’s a good place to start!
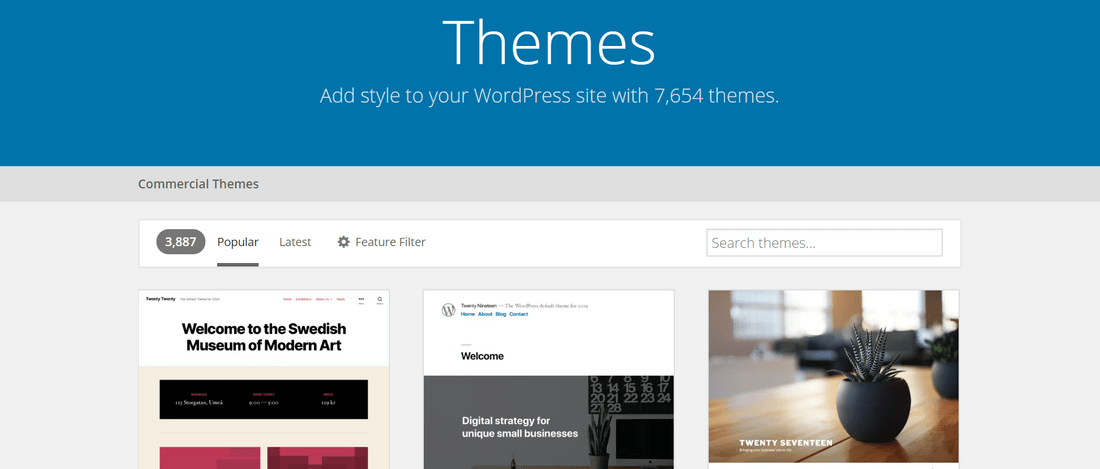
You can apply filters to help narrow down your search, such as only showing full width templates or themes designed for blogs. One filter that we recommend applying is “Translation Ready”, as this will make creating your multi language site much easier!
There are third party theme stores too – such as Theme Forest and Themify – where you can find even more themes.
A word of caution – always be picky when it comes to the theme you choose. Anyone tech savvy enough can create and sell WordPress themes, and some can contain malicious code designed to corrupt your site. Read reviews and do your research to make sure your theme is safe.
- Is it mobile-responsive? Internet users (and Google) no longer have time for websites that aren’t mobile friendly!
- Is it translation ready? You can find translation ready themes by using the feature filter in the WordPress theme library.
- Do I love it? This theme forms the basis for your website’s design – you should love it, and be excited to start working with it on your own website!
Once you’ve found your perfect theme, install it into your WordPress site!
- Browsed themes to find one you love
- Checked it’s translation ready and mobile-friendly
- Made sure the theme seems safe
- Installed your theme
Step 6: Customize your site and create your content
It’s time to customize your theme and upload your content!
You can add content to WordPress by creating new pages (static pages that are always relevant, such as your homepage or About Us page) and new posts (more timely articles, such as blog posts).
WordPress’ editor, Gutenberg, has introduced a block-based editing style, where you choose sections and build your page from a menu containing elements such as text boxes, images, buttons, and so on.
If you want truly unlimited customization in WordPress, it’s worth learning a little bit of code to take your design tweaks to a new level.
- Written and published new content for your site
- Customized your theme
Step 7: Make your site multilingual!
Now that you have a website and content to translate, you can set about making your website multilingual.
We recommend using the WPML plugin to create your multi language website.
We have a much more detailed guide on how to use this plugin in our How to Make a Multilingual WordPress Website step-by-step walk through. Right now though, we’ll take you through the basic steps to get you started.
First, backup your WordPress website
It’s important that you have a saved version of your site, just in case anything goes a bit sideways.
Buy, download, and install the WPML plugin
Visit the WPML website, pick the plan you want, then download the plugin. You can then install it from your WordPress plugin dashboard. Remember to click Activate to get things started!
Set up your plugin
This involves setting your default language, choosing your secondary languages, and deciding if you want flags or written menus for your language switcher.
Translate your content
The plugin splits your content into sections down the left-hand side of your screen – you can then enter your translation into the boxes on the right. This ensures you don’t miss anything out when you’re translating your pages!
WPML also has an automatic machine translation, which is available on its two most expensive plans. This translates your content for you, without needing to leave WordPress – it does it all in your editor.
WPML also leaves room for you to:
- Translate content yourself
- Use a different translation tool (like Google Translate)
- Find your own translators
- Use WPML’s Translation Management service, where you can send pages off to be translated by a professional (for an extra cost)
Translate categories, themes, plugins, and menus
With a WordPress site, you rely on a lot of different components to work together to display your site properly. Make sure to translate all the different parts of your site, so that you don’t get random sections in different languages!
- Backed up your website
- Installed the WPML plugin
- Translated your content
- Translated plugins, your theme, menus, and so on
Step 8: Install any extra plugins you need
The WPML plugin is useful for translating your WordPress site, but it isn’t the only plugin you’ll need. WordPress sites don’t come with built-in features, so you’ll need to install plugins for all the features you want your site to have.
WordPress has an official plugin directory, which has thousands of plugins to choose from and is a great place to start looking for any extra features you might need. Popular plugins include:
- SEO – Yoast SEO
- Security – Wordfence Security Firewall & Malware Scan
- Contact forms – Contact Form 7
- Anti-spam measures – Akismet Anti-Spam
- Ecommerce features – WooCommerce
- Backups – UpdraftPlus
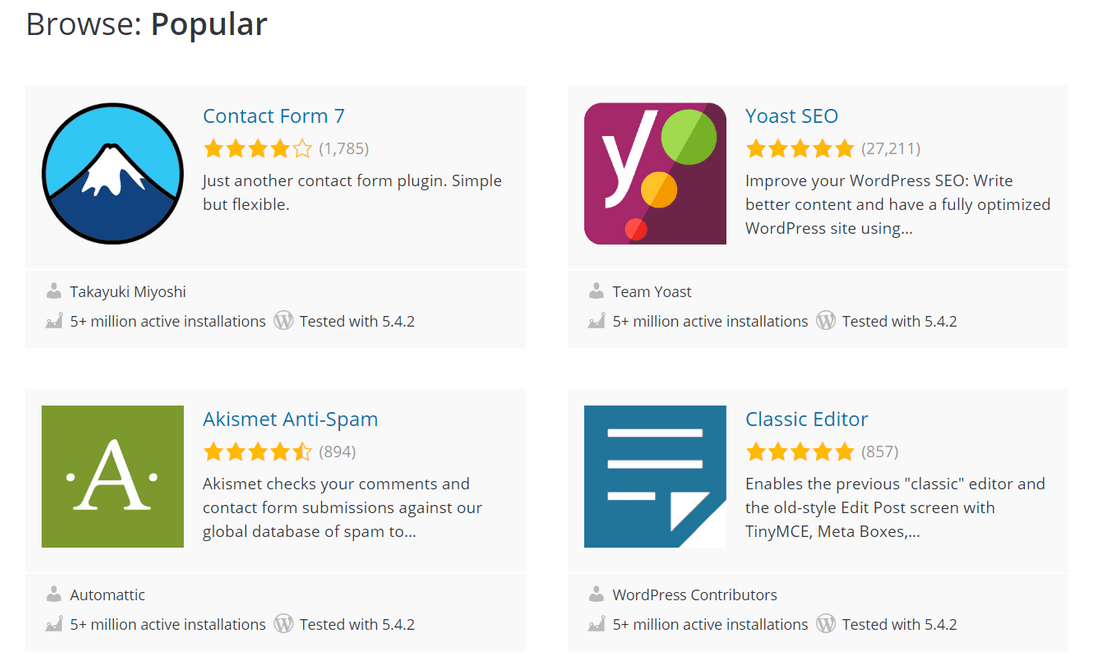
Try not to add too many plugins, as they can slow your website down – there’s no official recommendation for the correct number, so just keep an eye on your load speeds. Try to aim for around 20 to start with, and see how you go.
- Thought about which plugins you need for your website
- Found the best plugins – check reviews!
- Installed extra plugins to use on your site
Step 9: Check, preview, and publish your multi language WordPress site
By now, you should have a beautifully designed, content-rich, multi language WordPress site that’s full of handy features and ready to go live!
As always, you should preview, check, and double check your site. Ask a friend to explore your website and point out any errors they see – you can become blind to your own mistakes, especially if you’ve been working on your site for a long time.
Once you’re happy that your translations are correct, your links are working, and your site is displaying beautifully (and quickly) on all devices, go ahead and publish!
Let’s take one more nostalgic look back at the steps you’ve taken to get here:
- Decide if you want to use WordPress.
- Choose the best web host for you (we recommend Bluehost).
- Register a unique domain name.
- Install WordPress to start building.
- Pick a theme you love.
- Customize your site and create your content.
- Make your site multilingual!
- Install any extra plugins you need.
- Check, preview, and publish your multi language WordPress site.
And there you go – one stunning, multi language WordPress website to delight your international visitors.
Should You Use a Website Builder or WordPress to Build a Multi Language Website?
Just to be clear, there is no right or wrong answer to the question “should you use a website builder or WordPress to build a multi language website?” Instead, it’s about finding what’s right for you.
Website builders are best for anyone who wants a website that’s easy to build and manage, where you don’t have to focus on the technical side of things too much, and that you can publish pretty quickly.
| Website Builder Pros | Website Builder Cons |
|---|---|
| Very beginner-friendly and easy to use, with no tech skills needed | Some builders can be limited, meaning you hit a glass ceiling as you grow |
| You can get a site up and translated quickly | Not all builders have multi language capabilities |
| It’s a cheap option that delivers professional results | You have less control than using WordPress |
WordPress is best for those who want to create a large, complex website, and don’t mind getting hands on with the technical side of setting up and running a site. This is for people who are happy to take their time learning their way around WordPress, and want total control over their site.
| WordPress Pros | WordPress Cons |
|---|---|
| It’s extremely flexible and powerful, giving you ultimate control over your site | Using the WPML plugin requires you to be pretty technically confident, especially if you’re translating a large site |
| It’s free, meaning you can set your own costs by choosing cheap hosting, plugins, etc. | WordPress is more time consuming to build with and maintain than a website builder |
| WordPress is scalable, and can handle complex websites – perfect for very large businesses | Prices are hard to calculate because there are multiple costs involved – hosting, security, plugins, etc. |
5 Things to Avoid When Building a Multi Language Website
#1. Relying 100% On Google Translate
We hate to parrot your French teacher, but please don’t rely on Google Translate! It’s helpful to a certain extent, but the worst thing you can do when translating your website is to copy and paste whole pages of content into Google Translate and back again.
Yes, it is really quick and easy and useful – but it’s also not always very accurate.
We’re not saying never use it, we just want to recommend that you don’t rely on it for all of your translations. Use it to check words and short sentences, or just as a helpful reference.
Google Translate is helpful for ensuring that visitors will get a general idea of what you’re trying to say. But, if you want to impress your visitors, win new businesses, and sound professional, then Google Translate is probably not the best option for you.
#2. Too Many Duplicate Pages On Your Menu Bar
So even if you’re willing to manually translate the text on your website, how are you going to create a website where the menu bar doesn’t show multiple pages of the same thing, but in different languages?
The last thing you want to see is a menu bar with three home pages in three different languages. Three versions of every single page will overload your menu bar, and really diminish the user experience for your visitors.
This is where having a language switcher comes in, where you have different versions of your site in different languages – it makes for a much smoother user experience!
#3. Using Fonts That Aren’t International
It’s an easy one to forget, but make sure you choose a font that displays special characters. French accents (like this: é) can totally change the meaning and pronunciation of a word, so they’re important to include and get right!
#4. Including Culturally Insensitive Photos or Words
This usually applies if you’re using outdated stock photos, where cultural stereotypes can sometimes raise their unwanted heads. Make sure the images you’re using are inclusive, and represent the people you’re writing for.
Don’t enthusiastically but carelessly translate your site into 50 different languages, but only show images of one country, one nationality of people, or one style of cuisine, for example.
The same applies to the language and words you use. The basic rule is: think before you speak (or write) – especially if you’re writing for an international or diverse audience!
#5. Messing Up the Date and Time
If you’re displaying the date of blog posts on your site, are you formatting them day-month-year or month-day-year? This is a small, simple thing that can cause endless confusion, even between American and English people!
If you want to avoid confusion, it’s safest to simply write out the full date: July 23rd 2020, for example.
How to Build a Multi Language Website: Conclusion
Creating a multi language website isn’t always as easy as we wish it would be, but there are ways to make your website’s content multilingual. You can even do it without tech skills, or paying someone else to handle the hassle!
The key choice is whether to use a website builder or WordPress to build your multi language site. Website builders are faster, easier to use, and more convenient, while WordPress has more powerful – but also more difficult – multilingual capabilities.
If you choose a website builder, we recommend Wix, with its built-in multilingual features, or Weebly with its choice of apps. Squarespace is a top builder, but it’s more difficult to use.
If you choose WordPress, we recommend Bluehost for your hosting needs, and the WPML plugin for your translation functionality.
Whatever you choose, you’re now all set to go on to create your own multi language website with our step-by-step guide at your side!



47 comments