I Set Up A Squarespace Membership Area: Here’s How It All Works In 2025
If you click to purchase a product or service based on our independent recommendations and impartial reviews, we may receive a commission. Learn more
Want to create a membership website and offer followers a curated selection of premium content? Squarespace – which came second out of all the membership website builders in our testing – is a brilliant place to start.
Known for its straightforward editor and elevated templates, Squarespace enables you to easily create your own membership area. Once you’re done, you can then sell premium content to members, be it your best baking recipes or exclusive digital marketing tips.
Keen to learn how to set up? Want some inspiration from other brands? Curious to discover my top tips? Read on as I spill all on Squarespace’s Membership Areas.
What Are Squarespace Membership Areas?
Squarespace Membership Areas (also known as Squarespace Member Sites) allow you to create restricted access areas on your Squarespace-created website.
With a Squarespace Membership Area, you can provide access to members-only content such as premium articles, videos, online courses, e-books, webinars, community forums, digital downloads, discounts, or any other type of exclusive material or experiences.
You can choose to make your Squarespace Membership Area free to register for, or charge a subscription fee.
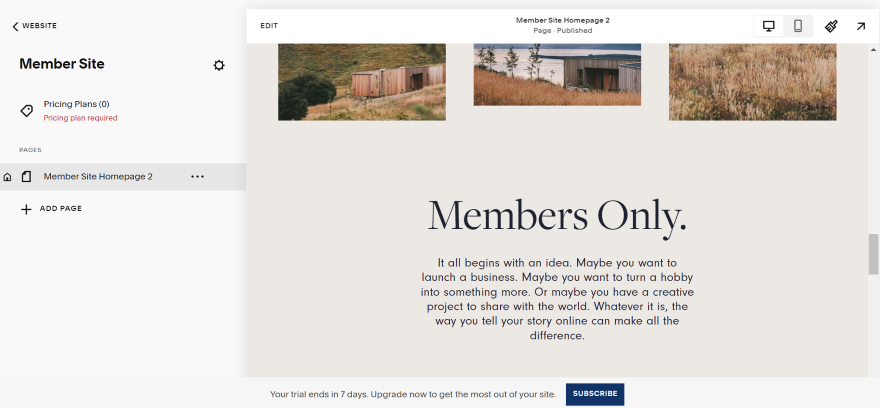
How to Create a Squarespace Membership Area
Ready to create your own Squarespace Membership Area with the website builder? Here’s how:
1. Selecting a Plan
First, you’ll need to build a website with Squarespace – that seems straightforward enough. And, fortunately, it is. In our tests of the best membership website builders, Squarespace ranked easiest to use.
To add a membership area to your website and accept payments from subscribers, you need to be on:
- One of Squarespace’s pricing plans that enable you to accept payments. Currently, this is either the Business plan ($23 per month), Basic Commerce plan ($28 per month), or the Advanced Commerce plan ($52 per month).
- AND one of Squarespace’s additional membership plans. You can use the included plan which is free, or one of the paid plans starting from $9 per month (billed annually)
For reference, below is a pricing table detailing the membership area plans:
| Plan | Price Per Month (Billed Annually) | Transaction Fee | Additional Video Storage |
|---|---|---|---|
| Included (Without Add On) | +$0 | 9% | 30 minutes |
| Starter | $9 | 7% | 10 hours |
| Core | $29 | 3% | 50 hours |
| Pro | $89 | 0% | Unlimited |
As you can see, there’s a substantial transaction fee difference between plans, with the most expensive plan also scoring you zero transaction fees. On the cheapest plan, you’ll need to pay 7% on every sale you make through your membership area.
With that in mind, choose carefully – and be sure to select the plan that’s the best fit for your business’ size and sales volume.
2. Creating Your Membership Area
Once you’ve signed up to Squarespace, chosen your plan, and set up your website’s base design, it’s time to create your membership area.
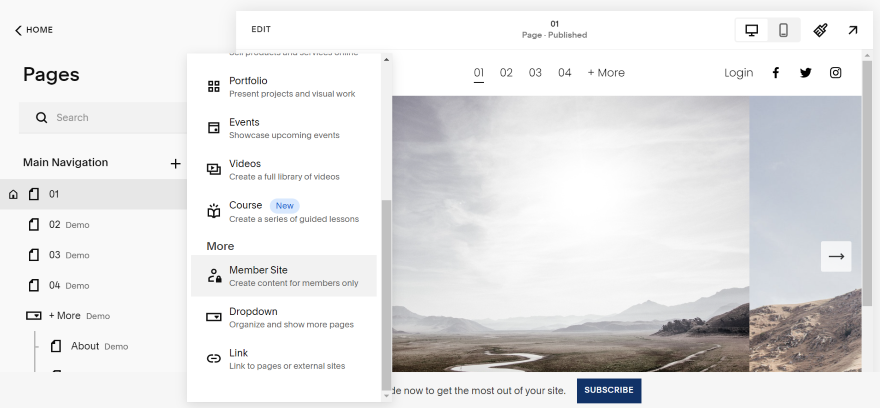
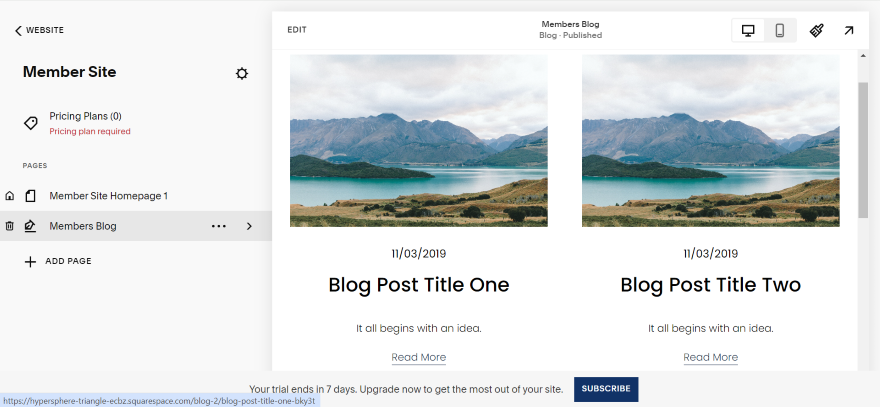
To start, I opened up Squarespace’s editor. From the left-hand menu, I clicked on “Pages,” the cross icon next to “Main Navigation,” and then “Member Site” from the dropdown.
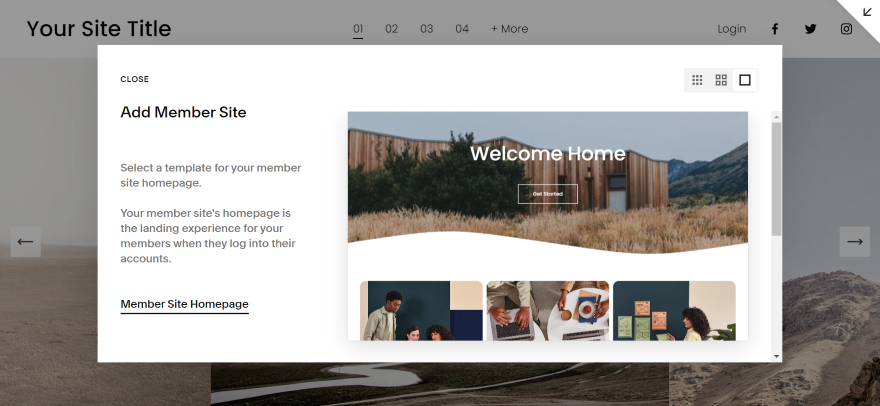
A new popup will now appear on your screen. I could choose between two different layouts for my membership area, so pick a design that best complements your business’ style.
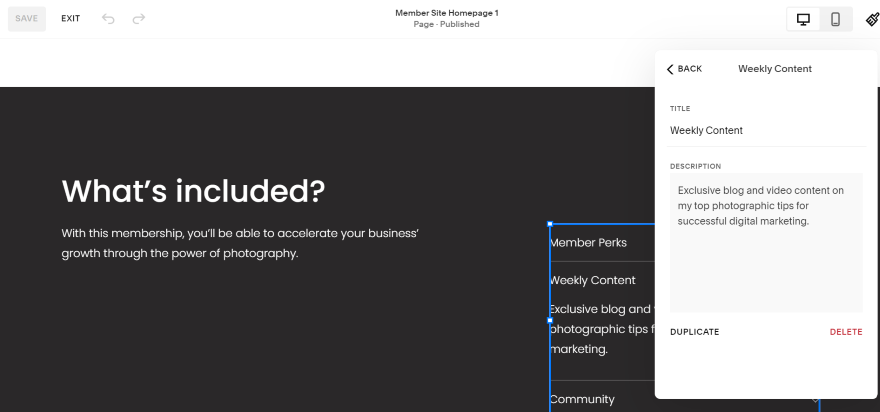
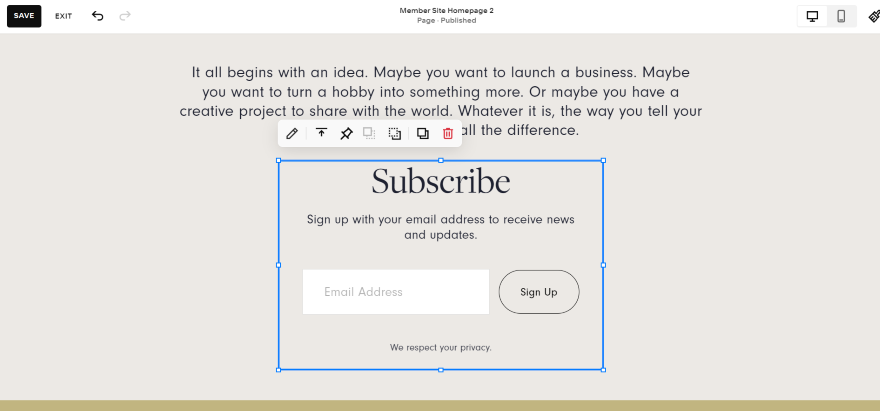
This next stage is all about customization. After choosing my website’s design, I could then start editing my membership area and adding content to it. This could include exclusive pages, blog posts, videos, and downloadable resources to keep subscribers engaged.
To change the design and switch Squarespace’s placeholder content with your own, click the “Edit” button near the top of the screen. From there, I could upload new imagery, add useful content like customer FAQs and membership package information, or click on the paintbrush icon to tweak colors, fonts, and the appearance of CTA buttons.
To add new pages (which will only be visible to members on your website), I went to the left-hand sidebar and clicked on the “Add Page” button. You can then select a page option that best fits its purpose, whether that’s “Blog,” “Portfolio,” “Events,” or even a “Blank page” you can build from scratch.
3. Creating Pricing Plans
Now it’s time to create pricing plans for your subscribers. This could include a one-off payment, or a recurring plan that’s paid monthly or yearly.
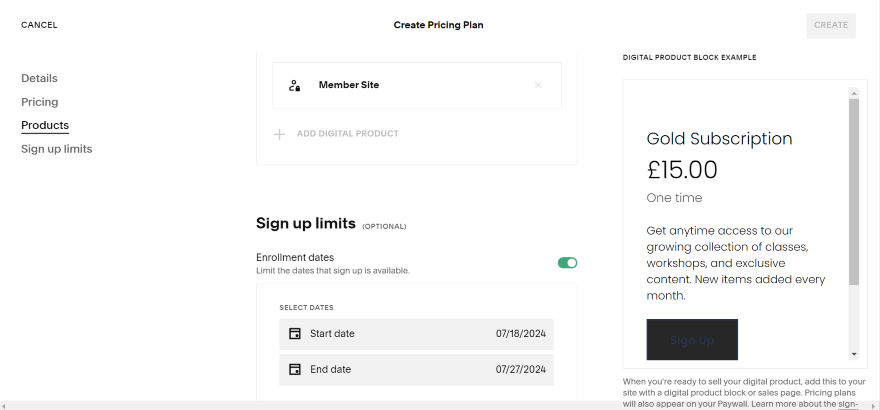
From the left-hand sidebar, I selected “Pricing plans,” which opened up a new page. On this page, I could:
- Name a subscription plan.
- Add its description and list which benefits are included.
- Assign the pricing. You can choose between a one-time payment, recurring payments, or even a free option.
- Add any digital products you’ve created that are included with the plan.
Once you’re happy, click the “Create” button at the top-right corner.
4. Editing the Paywall Page
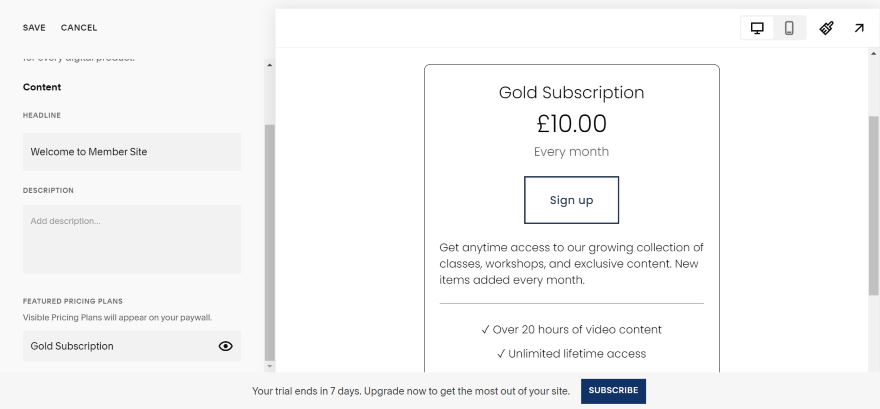
Once you’ve added your subscriptions, you’ll be able to edit the paywall page. This page is shown to both non-members or logged out subscribers if they try to access your membership area.
From the left-hand sidebar, I clicked the “Paywall” button next to the padlock icon. This opened up a new page, allowing me to change the page’s headline, description, and the pricing plans displayed.
5. Setting Up Payments
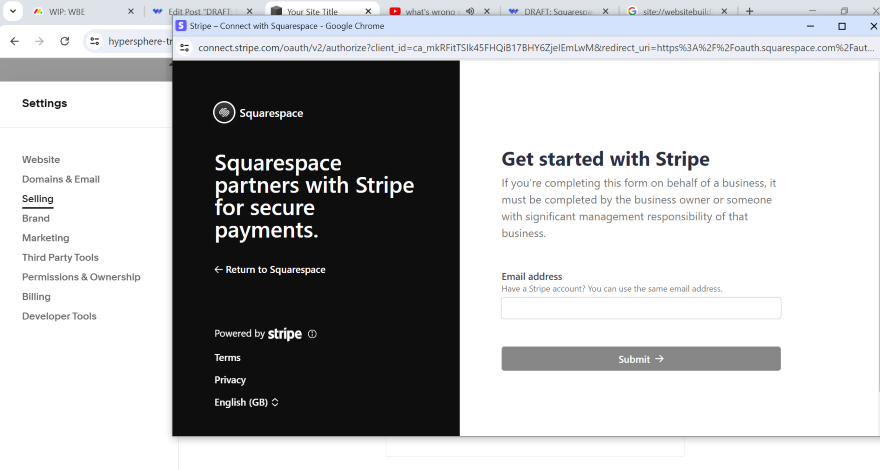
Finally, you’ll need to connect with your preferred payment processor, so you can actually accept all those membership fees once the subscriptions start flowing in. Fortunately, it’s far easier than it sounds.
From the dashboard, I selected “Selling” and then “Payments.” From there on, it’s straightforward. You can click on the payment methods you’d like to integrate, from PayPal or Stripe, and then follow the instructions shown.
Benefits of Squarespace Membership Areas
Setting up a Squarespace Membership Area offers a huge range of benefits for your brand, business, and bottom line. Here are four benefits:
- Another source of income – By restricting your best content to paying subscribers, you can generate a consistent stream of revenue. And, by creating different membership tiers – each with its own unique benefits and pricing – you can cater to a wider breadth of audience preferences and income levels.
- Free to create – It won’t cost you anything to add a Squarespace Membership Area to your website. However, you will need to be on one of Squarespace’s paid plans – either Digital Products or a Business or Commerce plan – to enable this feature.
- Simple to set up and manage – Squarespace’s drag-and-drop interface makes it easy to create your membership website in your brand’s own image; customizing the content and layout to fit your business’ unique look and feel.
- Build a community around your brand – Squarespace Membership Areas facilitate greater member interaction, allowing them to discuss, debate, and get to know each other through comments, forums, and other community features such as webinars, events, and live Q&A sessions. This fosters a sense of belonging among members, enhancing the community experience and spurring participation and interest.
Examples of Squarespace Membership Areas
Want to take a look at Squarespace Membership Areas in action? Let’s dive into three real-world Squarespace Membership Areas for inspiration:
1. Zarraffa’s Coffee
Australian-owned roastery Zarraffa’s Coffee utilizes its Membership Area feature for subscribers to its Z Card program.
By registering, customers not only get a free drink now (and on their birthday), but exclusive access to recent news, offers, giveaways, and competitions, too – all offered through its Squarespace Membership Area.

Key takeaways: To get website visitors to subscribe, you need to give them an enticing offer that makes signing up worth it. Whether that’s a delicious cup of coffee, exclusive discounts, or the latest news, what exactly can you give them that’s of value?
2. Vocal Kinesthetics
Founded by Kimberly Moller, Vocal Kinesthetics is a San Diego-based voice coaching provider.
Built with Squarespace, VK’s website utilizes a Squarespace Membership Area to collect a monthly subscription fee of $99. This business model provides users with access to VK’s online studio, as well as a membership to VK – and all the community building and benefits that come with it.
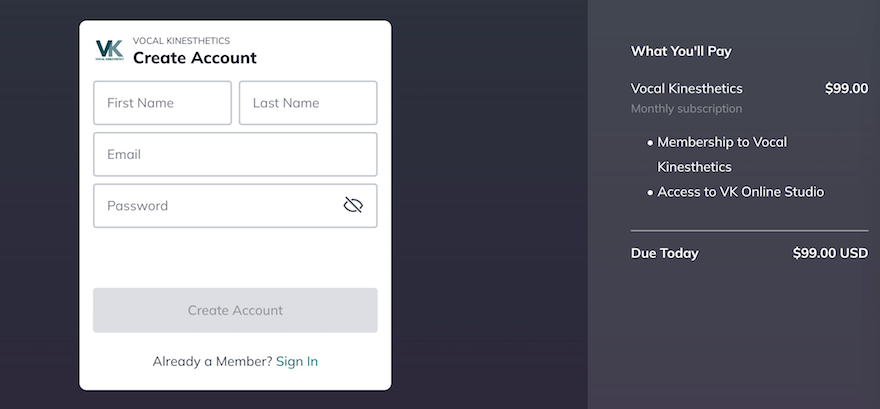
Key takeaways: If you’re accepting payments on your website (i.e. charging a membership fee like Vocal Kinesthetics), you need to make this process as seamless as possible so users can follow through when signing up. Ensure that your membership area’s checkout page actually works when testing it.
3. Yellow Co
A membership service for female entrepreneurs, Yellow Co’s gorgeous, minimalist homepage design is emblematic of Squarespace’s committed, laser-like focus on aesthetics.
Yellow Co is also, however, an excellent example of a site using a Squarespace Membership Area to win and retain subscribers. Signing up offers members exclusive access to PDF downloads, conference speaker videos, online courses, and quarterly “realign” sessions.
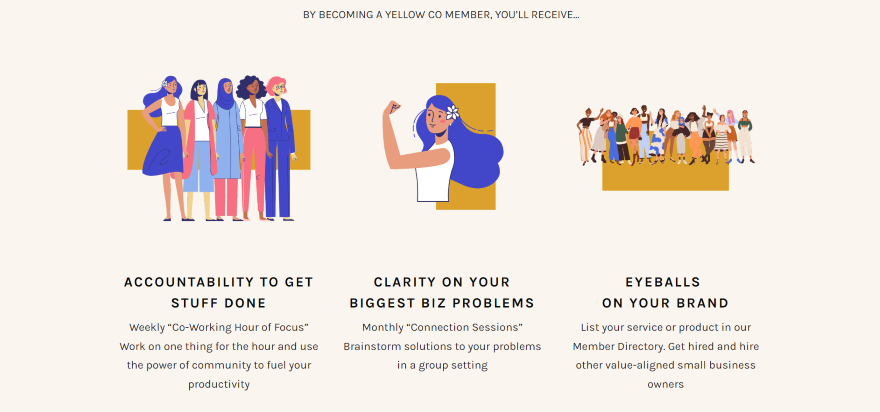
Key Takeways: Like Yellow Co, make sure your membership area page inspires through its content and design. Make use of distinctive visuals to capture website visitors’ eyes, and don’t be shy when describing the perks of your membership.
Tips for Creating a Successful Squarespace Membership Area
Putting together a Squarespace Membership Area is easy and relatively quick to set up.
But, to make it successful, you’ll need to put the work in. That means choosing the right membership business model, creating good content, setting the right price, and promoting your membership area to the right audience.
Here are my top tips to help you do just that.
- Choose the right content – First, you need to understand the interests and needs of your target audience. You can do this by conducting surveys or research to identify the topics, formats, and subjects they’re most passionate about. Armed with more information about your target audience, you’ll know what type of content to create. Then, you can offer members-only resources that provide real value, address specific problems, and offer the most relevant solutions.
- Set a fair price – Remember to research other membership sites, especially those offering similar content or experiences, or that operate in the same niche, to gauge what your audience might be willing to pay. Consider offering multiple membership tiers (each with varying levels of access and benefits) to appeal to all budgets.
- Promote your Squarespace Membership Area – Use compelling language and visuals to showcase its exclusive content, community interaction, and the plethora of perks your member site offers. Shout about it through every channel you have a presence on, be it your website or social media accounts, or via your email marketing database.
- Provide excellent customer service – Respond to member enquiries, concerns, and comments with speed and courtesy. Organize regular, member-only events, live Q&A sessions, and polls to keep them involved, engaged, and make them feel valued.
Creating a Squarespace Membership Area: Summary
Setting up a Squarespace Membership Area can help you build a community of paying subscribers, then – by engaging and re-engaging them with targeted, relevant content exclusive only to them – help them build a strong, enduring connection with your brand.
Better still, Squarespace is one of the best website builders to do it with. It’s the easiest website builder to use and offers the most design flexibility going. Even if you don’t find Squarespace immediately easy to use – which I think you will – our guide to how to use Squarespace should clear up any initial teething pains.
2 comments